Organisation Admins can edit settings for individual employees in the Users section of MyTime
When a new employee joins MyTime your organisation's standard working policies in the Employee Template and Organisation Settings are applied by default, but of course many of your employees may have a specific working agreement. No matter how many agreements there are, MyTime can cater for them all, by allowing you to edit individual employees' settings.
As standard, only Organisation Admins can edit individual employee settings.
Individual employee settings can be edited in the Users section of MyTime.
- Click on the Users menu option in the Admin section of the menu on the left hand side of your screen.
- Click the button next to the employee you want to customise settings for and click on Edit from the menu that drops down.
-1.png?width=688&name=Untitled%20design%20(43)-1.png)
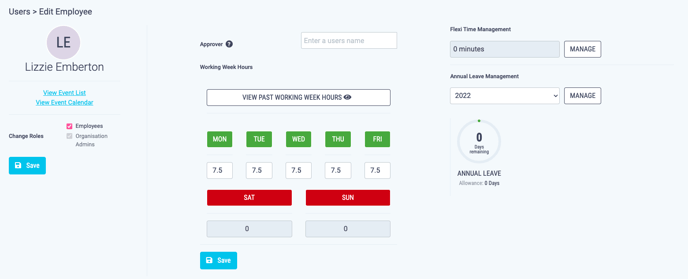
- This will take you to the Edit Employee screen, from here you can:
Change employees role:
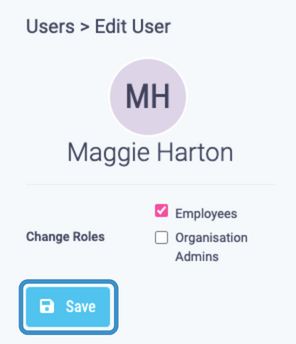
- To add an employee to a role check the relevant tick box then click Save.
- To remove an employee from a role uncheck the relevant tick box then click Save.
The organisation must have an Organisation Admin.
Update employees approver:
- Start typing the name of the employees' Approver in the Approval Information section.
- A dropdown list of Organisation Admins will appear, select the approver from this list.

A User must be an Organisation Admin before they can be assigned as an Approver. This can be assigned on the Roles & Users page.
Change working week hours:
- Select the days in this employees working week by clicking on the relevant days, as you click on a non-working day to add working hours they will turn from red to green.
Days in green are days this employee works and days in red are days this employee does not work.
- Type the number of hours worked each day in the text boxes underneath the working days.
-png.png?width=621&name=Untitled%20design%20(76)-png.png)
- Click Save to apply this information, this can be easily edited at any point.
Enable and edit shifts:
- To enable and edit shifts click the Turn on the Expected Hours Management/Shift Editor button

- A pop-up will appear asking you to confirm that you would like to turn shift editor on, click Ok to continue.
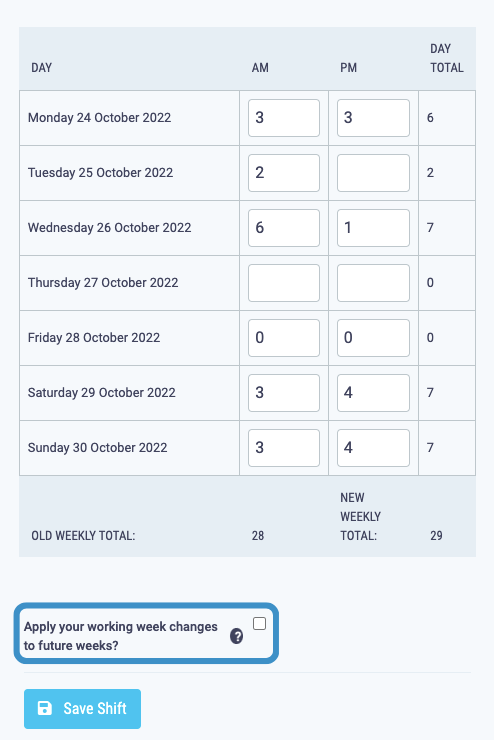
- Click on the date box next to the Shift field and use the dropdown calendar to select the week of the shift you would like to edit. The page will refresh and the days of that week will display in the table below.
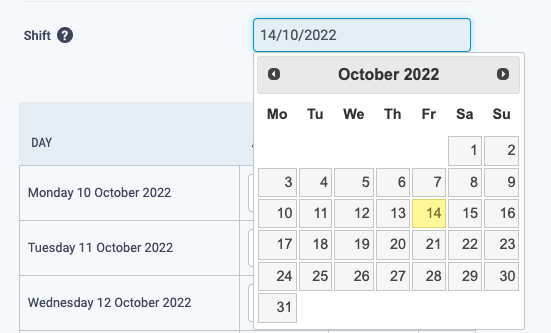
The table will display the Monday to Sunday of the week the day selected is in.
- The table will be pre-populated with your organisations default hours or your employees specific hours split evenly between AM and PM.
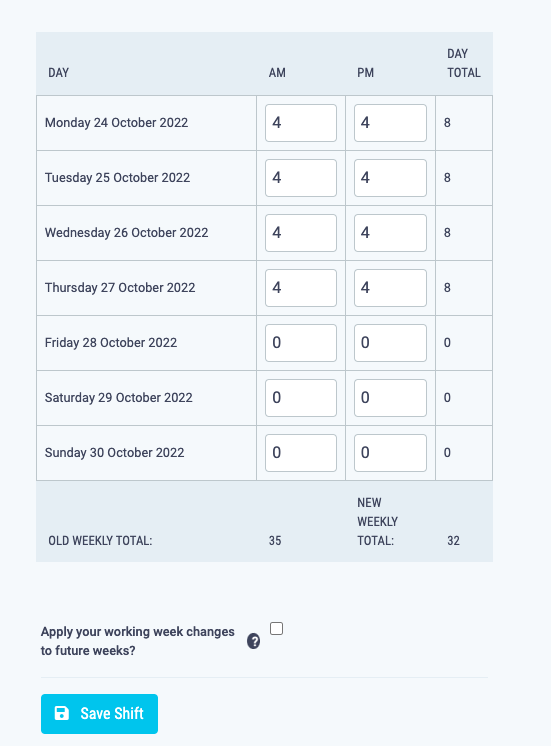
These hours will automatically pre-populate future weeks and will be used to calculate how much annual leave is taken off the allowance when time off is booked.
- Edit the hours for each day, to input your shifts, by clicking on each hours section and either using the up and down arrows to increase or decrease the hours or by typing in the hours.
Hours must be inputted in 0.5 hour increments.

- If your employees has an absence booked or requested you will receive an alert on the relevant days.
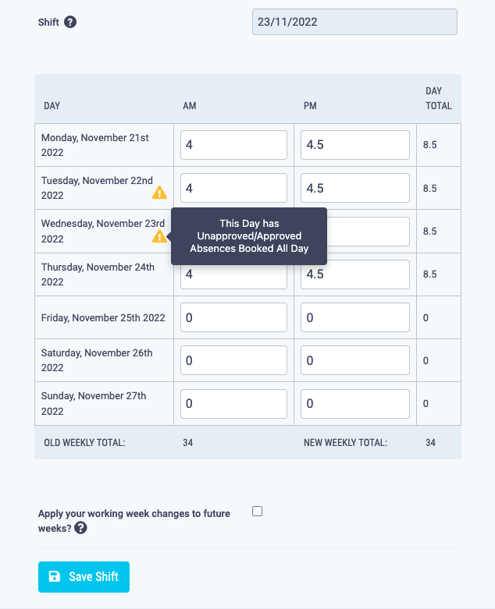
- Once you have inputted your employees shifts for the week you can set these hours as a default for all future weeks by checking the Apply your working week changes to future weeks? checkbox.
- Click Save Shift to save these changes.
View flexi-time:
- You can view their flexi-time in the flexi-time management section and add adjustments to their flexi-time by clicking the Manage Flexi-Time button.
.png?width=443&name=Untitled%20design%20(78).png)
View and manage annual leave allowance:
- You can view their annual leave allowance in the annual leave section and adjust an individual allowance by clicking the Manage Annual Leave button this will take you to a new page.
-png.png)
- In the Annual Leave section type in the number of annual days for this individual employee and click Save.
-png.png)
- You can also edit a specific annual leave year by clicking on the button next to the year you want to change and click on the Edit option from the menu that drops down.
.png?width=680&name=Untitled%20design%20(82).png)
- You can then adjust that years allowance and click Save to save the edit.
.png?width=680&name=Untitled%20design%20(85).png)

