The Calendar allows you to view records 'at a glance' and add, edit and delete Absences and Attendances.
Use the Calendar to view a monthly or weekly overview of records, and add, edit and delete absences and attendances. Employees can view and edit their own records, Admins can view and edit all employees records or view and edit individual employee records.
Users must be Employees to view or edit their own records and must be Admins to view or edit employees records.
- To view the calendar, click on the Calendar menu option found in the My Records section at the top left of the screen.
- From the Calendar you can:
Filter and sort records
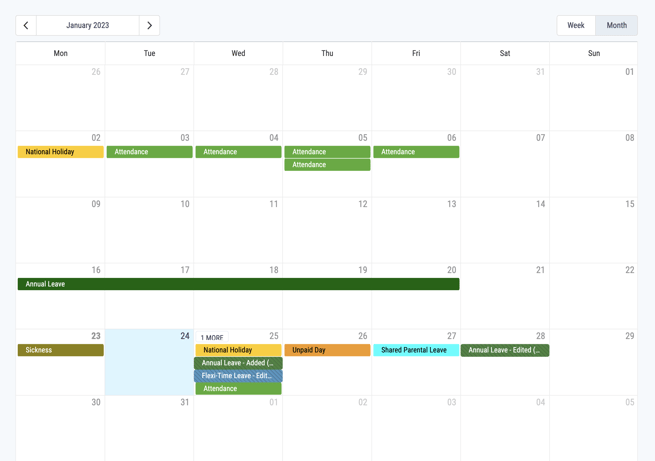
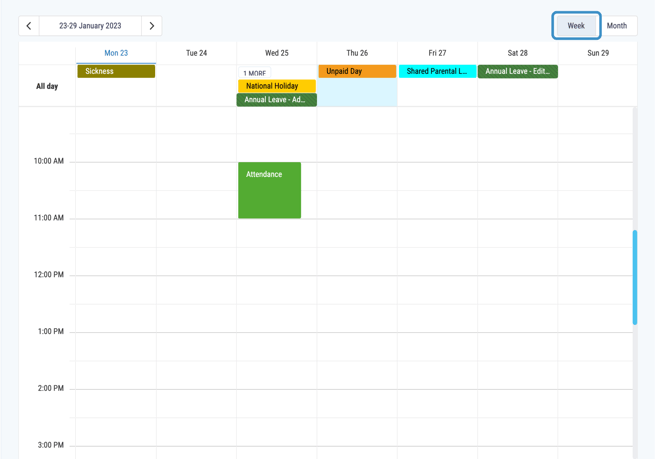
- By default the calendar displays in month view but you can use the button in the top right hand of the screen to switch it to week view.
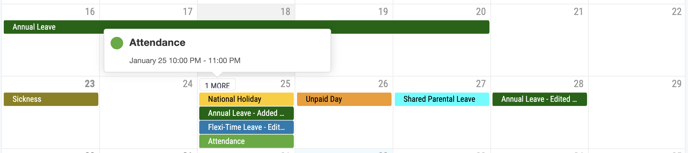
- When there are more records than can be displayed on a given day this is shown with a More button, clicking on this button displays more detail in a pop-up.
- To view an individual employee or record type use the search bar or dropdown filters in the top right of the screen.

Users must be Admins to view more than one employee or filter by employees.
Add an Absence
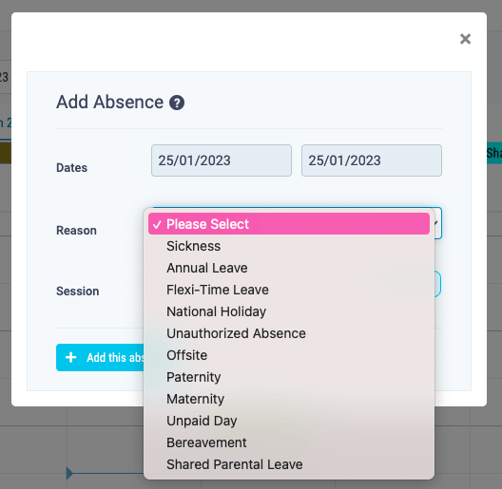
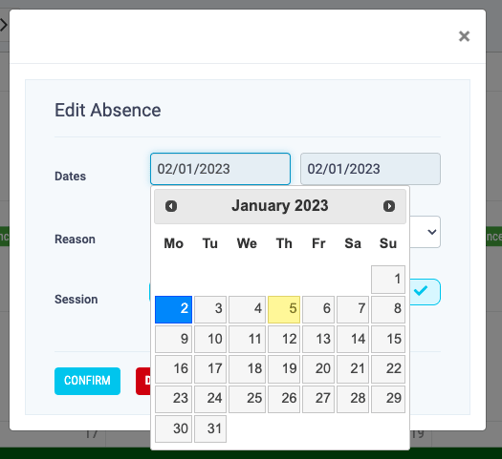
- Click on the day you want to add an absence to and a pop-up box will appear. To select your absence dates click on the grey boxes containing the dates - it will automatically be populated with the selected day - and use the calendar function to select absence dates.
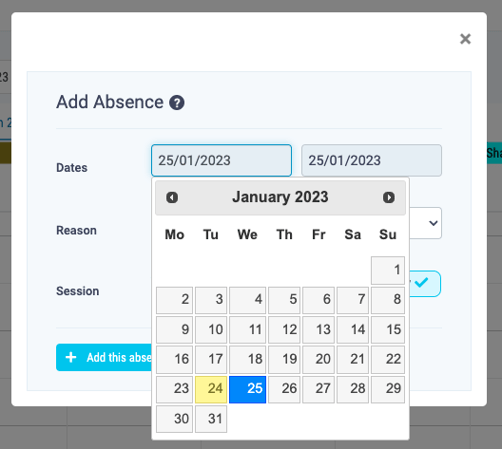
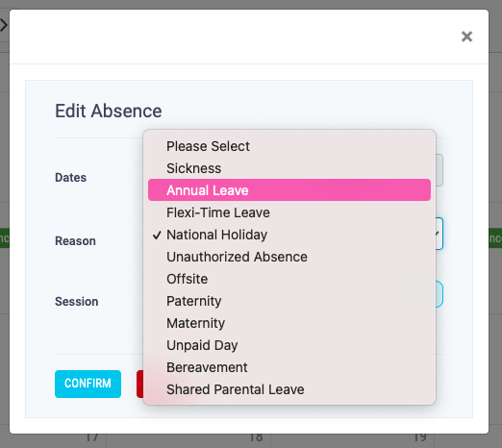
- Add an absence reason by clicking on the dropdown and choosing an absence type from the dropdown list.
- Select the absence duration using the Morning, Afternoon and All Day buttons.
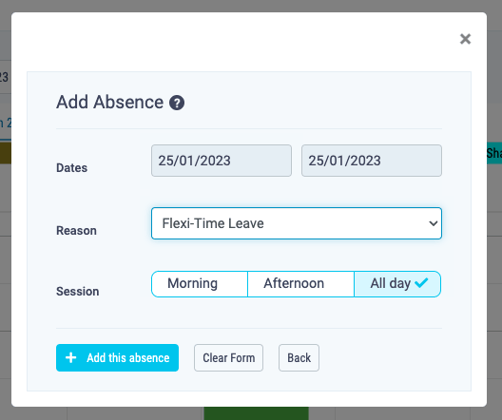
- Click Add this absence to submit the absence request.
- Your Approver will be notified of your request via email and on the MyTime dashboard.
Add an Attendance
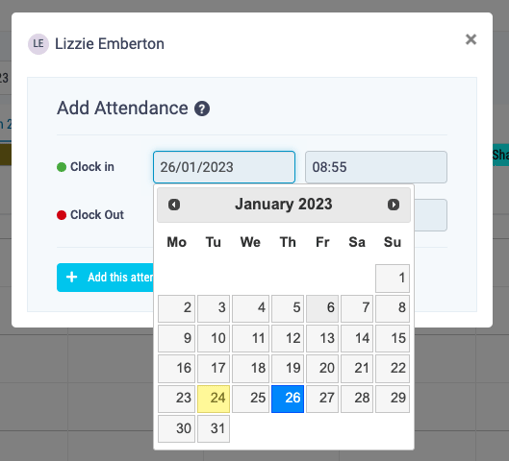
- Click on the day you want to add an attendance to and a pop-up box will appear. To select your attendance dates click on the grey boxes containing the dates - it will automatically be populated with the day selected - and use the calendar function to select your attendance dates.
- To add the attendance time click on the empty grey box and use the clock function to select clock in and clock out times.
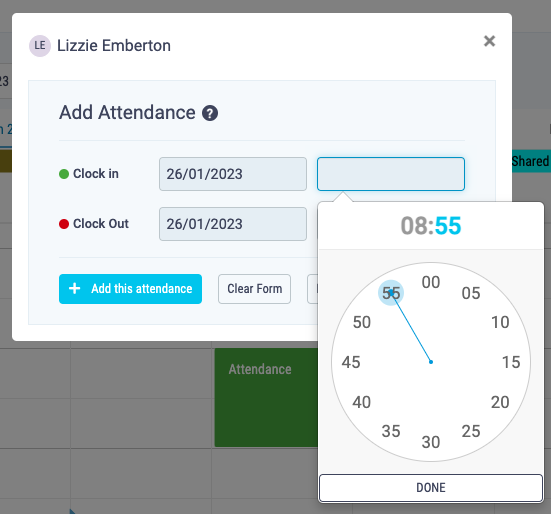
- Click Add this absence to submit the attendance.
- Your Approver will be notified of your new attendance record via email and on the MyTime dashboard.
Delete a Record
- Click on the record you wish to delete and a pop-up box will appear - this process is the same for both absences and an attendances.
- Click the Delete button to delete the record, a pop-up will appear asking you to confirm deletion, click Ok to confirm.
- An email notification will be sent to your approver to approve deletion.
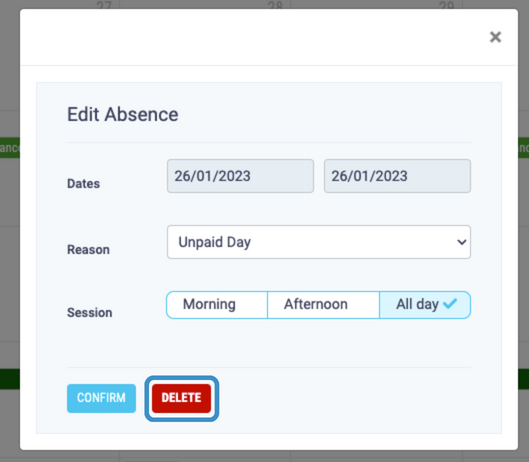
Edit an Absence
- Click on the record you wish to edit and a pop-up box will appear. To change the absence date(s) click on the grey boxes containing the date(s) you want to change and use the calendar function to select a new date.
- To change the absence reason click on the dropdown and choose a new absence type from the dropdown list.
- Change the absence duration using the Morning, Afternoon and All Day buttons to change the time period for your leave request.
- Click Confirm to submit the change request.
- An email notification will be sent to your Approver to approve your changes, it will be marked 'Pending' until your approved has approved or rejected your edit.
Edit an Attendance
- Click on the record you wish to edit and a pop-up box will appear. To change the attendance date click on the grey box containing the date you want to change and use the calendar function to select a new date.
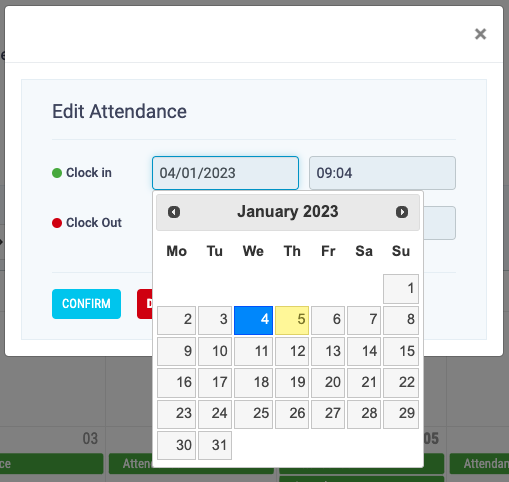
- To change the attendance time click on the grey box containing the time you want to change and use the clock function to select a new times.
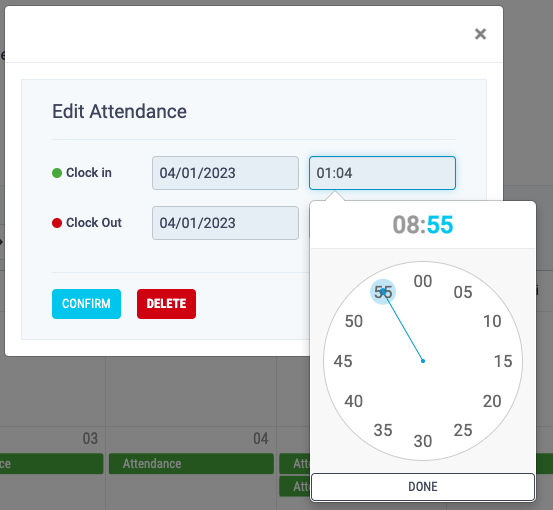
- Click Confirm to submit the change request.
- An email notification will be sent to your Approver to approve your changes, it will be marked 'Pending' until your approved has approved or rejected your edit.