If your input has a sub-task or sub-process which must be completed before your input, this can be represented in ATC by creating a child input.
Only an input's owner can create a child input.
Owners can create a child input or assign a new parent input from the input detail screen.
- Start by finding the input you would like to make a child input for, click on the Inputs menu option found at the top right-hand side of the screen.
When an input has a child input it becomes a parent input.
- By default the input's List View will display.
- Select the input you want to add a child input to, you can do this by searching using the Search Filters on the left-hand side of the screen.
- Click on this input's title - this will take you to the input detail screen.
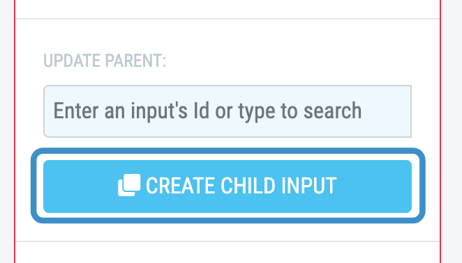
- Click on the Create Child Input button in the Manage This Input section, you may need to scroll down to find it. This will open a new a submit input page.
- This submit input page will be pre-filled with the text from the parent input. Click on the Title and Detail sections to edit this text, ensuring the title is not a duplicate and that the information in the detail section is relevant.
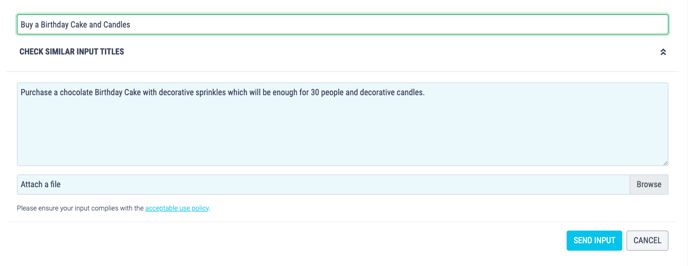
- Attach any supporting documents by clicking Browse.
In order to attach a file they must be stored on your computer and be a PDF or image file [files ending in .pdf, .gif, .jpg, . jpeg, .png and .bmp]. This is to ensure malicious code can't be attached and keeps your crowd secure.
- Click Send Input to submit the input.
- The Parent ID will appear in the child input tags.
.png?width=688&name=Untitled%20design%20(1).png)
- Once you have submitted the input you will be taken to the Input Detail Screen. The child input's moderation settings will be automatically taken from the parent input, if you would like to change them you can update them here.