Filter and Sort Process Maps
Users can Filter and Sort Maps from the Library and Admin Views.
Users can search for a Process Map from both the Library and Admin sections of Process Library.
Filtering and Sorting Maps in the Library View
- To filter and sort maps in the Library View click on the Home button in the top right of the screen and select My Processes from the dropdown.

- This will take you to the My Process view, which displays a list of approved Process Maps.

- To filter the Process Maps click on the Choose Columns button at the top left of the view.

- A pop-up will appear that allows you to add column headings from System Properties (properties built-in to Process Library) and Custom Properties (properties created by your users for your Library).
- Tick the boxes of the properties you would like to be a column heading and click Update.
You can close the pop-up without making any changes by clicking the Cancel button in the bottom left corner or the X in the top left corner.

- The pop-up will close and your list will be displayed with the new column headings you have selected.
To remove any columns click Choose Columns, deselect the properties you wish to remove and click Update.
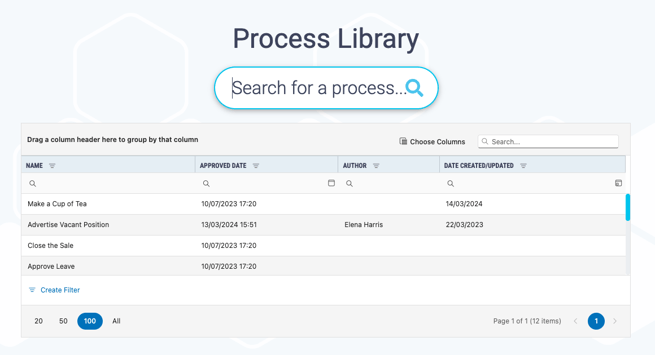
- To sort the Process Maps based on your columns simply click and hold the column title and drag it into the top bar.
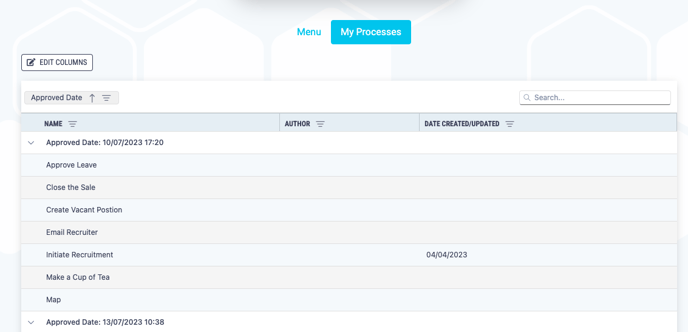
- This will automatically organise the name column by this property. To change order (ascending or descending date, A-Z or Z-A etc.) simply click on the button in the top bar - this will change the arrow direction.
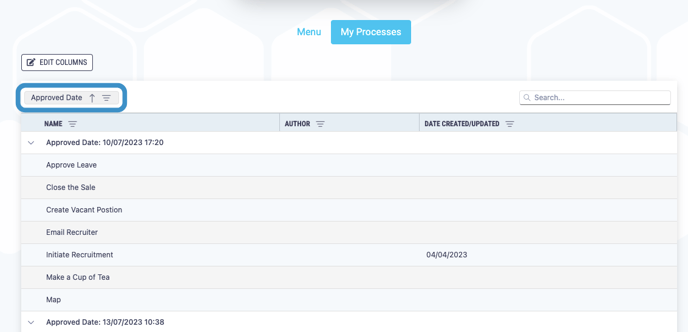
To remove this filter simply drag the button from the top bar back to the columns.
- To filter on a specific column click on the icon next to the column title. A dropdown will appear with the properties you can filter on.

- Select the properties you would like to filter by in the tick boxes and click OK.

- All the process maps that have these properties will be displayed.

To remove the filter, click on the icon again and tick the Select All box and click OK or click on the Clear button in the bottom right of the screen.
Filtering and Sorting Maps in the Admin View
- Sort process maps in the Admin view from the Process Maps list.

- To filter the Process Maps click on the Choose Columns button at the top left of the view.

- A pop-up will appear that allows you to add column headings from System Properties (properties built-in to Process Library) and Custom Properties (properties created by your users for your Library).
- Choose if you would like to filter by Live Custom Properties or Draft Custom Properties using the Custom Properties Source dropdown.
If you choose Draft Custom Properties then your results will include draft maps.

- Tick the boxes of the properties you would like to be a column heading and click Update.
You can close the pop-up without making any changes by clicking the Close button or the X in the top left corner.

- The pop-up will close and your list will be displayed with the new column headings you have selected.
To remove any columns click Choose Columns, deselect the properties you wish to remove and click Update.
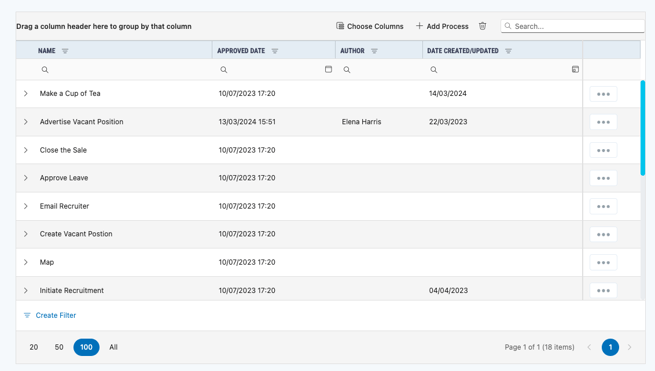
- To sort the Process Maps based on your columns simply click and hold the column title and drag it into the top bar.
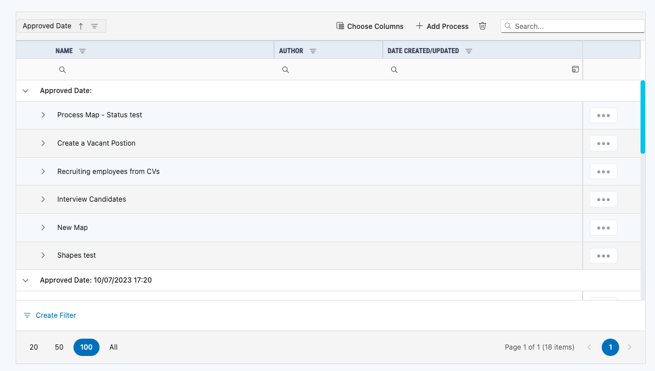
- This will automatically organise the name column by this property. To change order (ascending or descending date, or A-Z or Z-A etc.) simply click on the button in the top bar - this will change the arrow direction.

To remove this filter simply drag the button from the top bar back to the columns.
- To filter on a specific column click on the icon next to the column title. A dropdown will appear with the properties you can filter on.

- Select the properties you would like to filter by in the tick boxes and click OK.

- All the process maps that have these properties will be displayed.

To remove the filter, click on the icon again and tick the Select All box and click OK.